


 To Change the Number of Mailboxes Displayed in the Move Menu and Copy
To Mailbox Submenu
To Change the Number of Mailboxes Displayed in the Move Menu and Copy
To Mailbox Submenu
To change the number of mailboxes that are displayed on these menus:
Choose Move Menu Setup from the Options menu.
The Move Menu Setup Options dialog box is displayed.
Increase or decrease the number of mailboxes you have recently opened in the "Display up to: Recently visited mailboxes" field.
Click OK or Apply to make the change take effect.
Up to the desired number of mailboxes now appear on the Move menu and the Copy To Mailbox submenu of the Message menu.
Printing Mail Messages
You can print messages with the default options, or set different print options before starting the print job.
To Print a Copy of a Message with Default Options
Select the message to be printed in the Message Header List.
Shift+Click selects several messages in a row by moving the highlight up or down the Message Header List. Control+Click selects discontiguous messages from the list, one at a time.
Choose Print One from the Message menu.
To Print a Message with Specific Options
Select the message to be printed.
Shift+Click selects several messages in a row by moving the highlight up or down the Message Header List. Control+Click selects discontiguous messages from the list, one at a time.
Choose Print from the Message menu.
Set the options you want to change:
Type a new printer name in the Printer field.
Indicate the number of copies in the Copies field.
Type a banner page title in the Banner Page Title field.
Select Print Page Numbers to print page numbers in your document.
Type print command options in the Print Command Options field.
Click Print.
To Print a Message Using Drag and Drop
Select the message to be printed.
Drag the message onto the Printer control in the Front Panel.
The Print dialog box is displayed.
Set the print options as desired and click Print.
For more information, see "To Print a Message with Specific Options".
Note - For information on how to change the print action, see the section "Configuring and Administering Printing from the Desktop" in Common Desktop Environment: Help System Author's and Programmer's Guide
Working with Attachments
An attachment is an image, document, or executable file that you send or receive with your email.
To View an Attachment
Select the attachment icon in the attachment list.
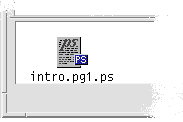
Figure 10-8 Example of an attachment icon
Choose Open from the Attachments submenu in the Message menu, or double-click the attachment icon.
Note - If Open does not appear on the Attachments submenu, you cannot open the attachment.
To Print an Attachment
Select the attachment.
Choose Print from the Attachments submenu in the Message menu.
Note - If your system does not provide the ability to print attachments, or if the attachment cannot be printed, the Print item will not be available.
To Add an Attachment
Compose your email message.
Choose Add File from the Attachments menu in the Compose window.
The Mailer - Attachments - Add dialog box is displayed. See "Using the File Selection Dialog Box"for more information.
(Optional) Click the Keep dialog box open on desktop check box.
This indicates that you do not want the dialog box to close after the Add button is clicked. This eliminates the need to choose Add File from the Attachments menu to add more than one attachment.
Select a file to attach and click Add.
The attachment is added to the attachment list in the lower portion of the Compose window.
To remove an attachment you just added, select its icon and choose Delete from the Attachments menu.
To restore a deleted attachment, choose Undelete from the Attachments menu.
(Optional) Choose Rename from the Attachments menu to change the name of a selected attachment.
If you drag and drop messages from the Message Header List in the main window to the attachment list, Mailer creates one mailbox that contains all of the messages.