 To Reverse Page Order
The page order of a document is often reversed when the file is prepared for printing; this is a convenient way to collate a document on printers that produce pages printed side up. To reverse the page order of a document you are viewing:
Choose Page Viewing Controls from the View menu.
The Page Viewing Controls dialog box appears.
Select the order in which you want the pages of the current document displayed (First Page First or Last Page First).
Click OK to apply your choices and close the dialog box.
 To Change the Size of the Displayed Page
The page description language used to create some documents may not include page size information. This can cause page boundaries to display incorrectly. To change the displayed page size:
Choose Page Viewing Controls from the View menu.
The Page Viewing Controls dialog box appears.
Select the size of the page you want for displaying the current document.
Click OK to apply your choices and close the dialog box.
See "Print Dialog Box" for information on changing the size of the printed page.
 To Save a PostScript Page as a Bitmap Image
Choose Save Page As Image from the File menu.
The Save Page As Image dialog box appears.
Select the file you want to save.
If you do not specify a file, Image Viewer saves the page currently displayed in the View window.
You can filter the Files list by typing a file-name condition in the Filter field and clicking Update. For example, typing *.ps will list only the files ending in .ps in the Files list.
Select the format in which you want to save the page from the File Format list.
See Table 16-2 for a list of file formats in which Image Viewer can save an image.
(Optional) Set a compression type through the Compression button menu.
(Optional) Choose the number of colors for the image from the Colors button menu.
The default is 256.
Type the name under which you want to save the file in the Enter file name field.
Click OK.
Printing
You can print an image or PostScript file in Image Viewer and set parameters for image position, orientation, and size, plus the more standard print settings such as page size and number of copies.
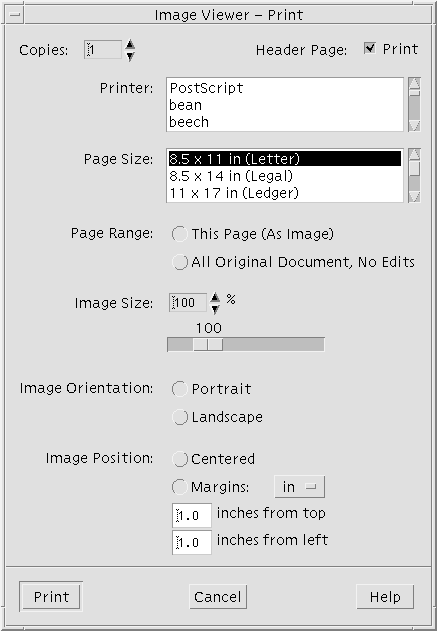
Print Dialog Box
Figure 16-4 Print dialog box

Table 16-1 Print Dialog Box Options
| Option | Usage |
|---|---|
Copies | Increase or decrease the number of copies to print. |
Header Page | Choose whether to print a header page. |
Printer | Select the printer on which to print your image from a list of printers. |
Page Size | Select from a list of standard page sizes. This value should correspond with the size of the paper in your printer. |
Page Range | Choose whether to print the entire document or one page. |
Image Size | If Page Range is This Page (As Image), you can choose whether to scale the image. |
Image Orientation | Choose between Portrait, which prints an image vertically on the page, and Landscape, which prints it horizontally. |
Image Position | Choose between Centered (default), which prints the image in the center of the page, and Margins, which uses the entered values for the top and left margins. The button labeled "in" or "cm" controls whether margin values are in inches or centimeters. |
 To Print (With Options)
Specify the details of the print job your print parameters.
See Table 16-1.
Click Print.
 To Preview a File to Be Printed
To see how the contents of the View window will appear when printed with the current Print dialog box settings:
Choose Print Preview from the File menu.
The Print Preview dialog box appears.
If the image is too big to fit on a single page, lines in the Print Preview window show you the boundaries of the printed page.
To control which area of the image or page is printed, move the pointer into the window (it changes to a hand shape) and use mouse button 1 to drag the image into position.
To print the image, click Print, and then click Print in the Print dialog box that is displayed.
See "Print Dialog Box" for information about print settings.
Click Close to close the Print Preview dialog box.
 To Print a Document
To print a single copy of the image or multiple-page document you are viewing:
Image Viewer prints one copy of the file, using the current Print dialog box settings.
See "Print Dialog Box" for information about Print settings.


