 To Set Appointment Options
Set up a basic appointment, as described above.
Click the More button in the Appointment Editor to display additional appointment options.
Select the desired appointment in the Appointment Editor list.
Select Beep, Flash, Popup, or Mail (or more than one, in combination) for the types of reminders you want.
Edit the reminder intervals and the Mail To entry if necessary.
Optional. To repeat the appointment more than once, choose an option from the Occurs menu, and then choose an option from the For menu.
If you don't see the interval you want, choose Repeat Every from the Occurs menu, and type the desired interval in days, weeks, or months.
Choose an option from the Privacy menu.
Others See Time and Text
Displays full appointment to others
Others See Time Only
Displays only time commitment, not description
Others See Nothing
Displays nothing to others
Click Change.
If you set the appointment options at the same time as setting up a basic appointment, click Insert at this step.
Note - If you are inserting multiple appointments one after another, be sure to click Clear between insertions. This will reset options that you may not want to carry over from one appointment to the next.
Click Cancel to close the Appointment Editor.
 To Change an Appointment
Click the Appointment Editor icon.
Select the appointment in the appointment list that you want to change.
Edit the appointment date, start or end time, description, reminders, frequency, or privacy.
Click Change.
Click Cancel to close the Appointment Editor.
 To Delete an Appointment
Click on the Appointment Editor icon to open it.
Select the appointment in the appointment list.
Click Delete.
Click Cancel to close the editor.
 To Find an Appointment
Choose Find from the View menu.
The Find dialog box is displayed
Type some text in the in the Find field that can become a keyword for the search; for example, conference.
The Find field is not case-sensitive.
By default, Calendar searches the past and future six months in your calendar. If you want to change the search range, click Search all to search your entire calendar (can take a long time) or edit the dates in the Search from fields.
Click Find.
Appointments with matching text are displayed in the Find window.
Select the desired appointment in the list.
Click Show Appointment to display the entire appointment.
Click Close to close the Find dialog box.
 To View an Appointment List
This section describes how to create an appointment list and display it on your system. If you want to print your Appointment list, see "Printing Calendars, Appointment, or To Do Lists".
Display the view of the calendar that you want the appointment list to show.
Choose Appointment List from the View menu.

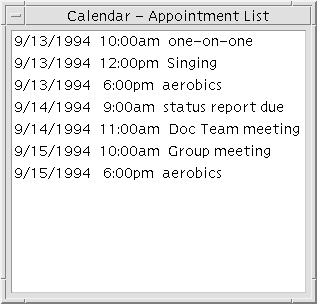
Appointments are listed chronologically and show date, time, and description. For example, if you are viewing by week, the Appointment List displays the week's appointments.
To Do Items
Use the To Do Editor to insert, update, or delete To Do items in your Calendar.
 To Insert a To Do Item
Click the To Do Editor icon.

Type or edit the due date for the item in the Due Date field.
Type a description of the To Do item in the What field.
Click Insert.
Click Cancel to close the To Do Editor.
 To Change a To Do Item
In Day, Week, or Month view, display the day for which you want to change a To Do item.
Select that day.
Click the To Do Editor icon.
Select the To Do item in the To Do list.
Edit the due date or the description of the To Do item.
Click Completed to change the status of the To Do item, if applicable.
Click Change.
Click Cancel to close the To Do Editor.


