 To Display Information About an Audio File
The File Information dialog box is displayed.
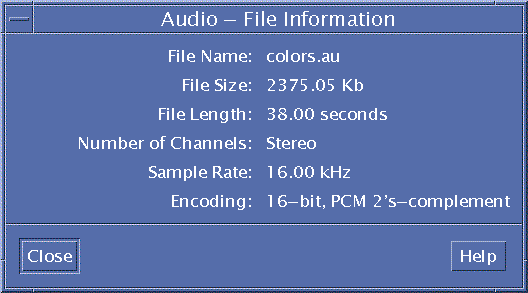
Audio provides the following information about the current file:
File name
File size in kilobytes
File length in seconds
Number of channels
Sample rate (in kilohertz)
Encoding (how many bits, what standard, etc.)
Audio Control
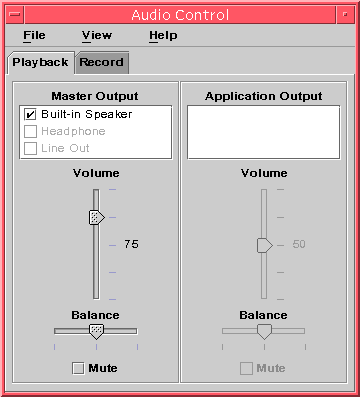
Audio Control enables you to control the volume and balance levels for playback and recording. Please refer to the following illustration for an example of the Audio Control window.
Menus
There are three menu items available:
File -- controls whether or not you want Mixer Mode enabled (the default is enabled). Mixer mode enables you to listen to two audio sessions at once. For example, while listening to a Sun Microsystems broadcast you will also be able to hear the tone alerting you that you have new mail. Refer to the following illustration for an example of the Mixer mode enabled.
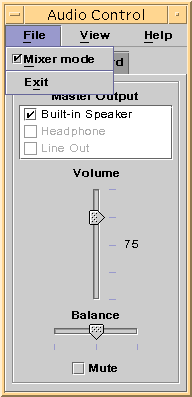
File is also where you will find the Exit command when you are ready to quit Audio Control.
View -- controls your audio input and output. Toggling the Applications Control shows/hides (toggles) all Master and all Application processes.
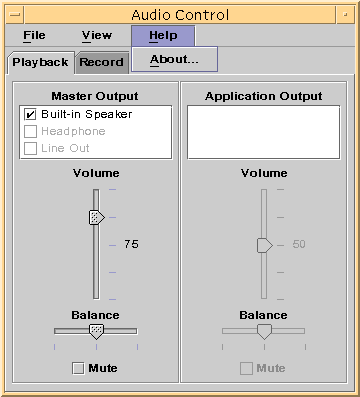
Help -- provides you with assistance in all areas of Audio Control. Refer to the following illustration for an example showing the Help pull-down menu.
Using the Tabs
There are two tabs, Playback and Record. Audio Control detects the type of device being used and displays the appropriate tab. The Playback window appears if used with a play-only device, such as speakers. The Record tab appears when used with a record-only device, such as a microphone.
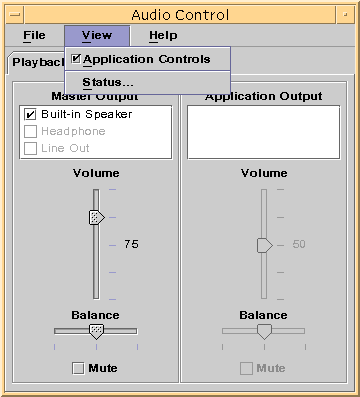
If your device supports both play and record, you can switch between adjusting Playback (Output) and Record (Input) by selecting the corresponding tab (toggles). If you have the Playback tab selected when you check the Application Controls box, the Application control box also displays. Refer to the following illustration for an example of this.
Master Output
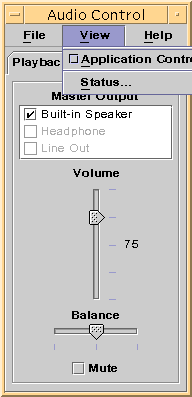
The following controls are provided on the Master Output window:
Output Source -- contains a list of available output sources. You check and uncheck sources to turn them on and off. Your choices are Built-in Speaker, Headphone, and Line Out. This list can grow to accommodate additional output devices. Volume and balance levels apply to all sources simultaneously, not to individual sources to turn them on and off.
Volume slider --for setting the master volume for all sources. The absolute level is displayed in a text label next to the control (the value is 50 in the figure above.) The displayed value changes as the slider is moved up and down.
Balance slider -- for setting the balance for all sources.
Mute -- for simultaneously muting all output sources.
Controlling Master Recordings
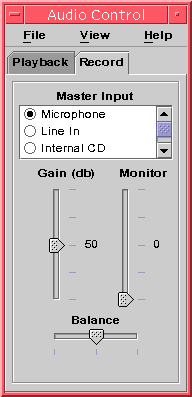
You can control master recording parameters on the Master Recording window. Access it by selecting the Record tab at the top of the window. Please refer to the following illustration for an example of this.
The controls provided are:
Master Input -- contains a list of the available input sources. You can choose only one input source at a time. The default choices are Microphone, CD ROM, and Line In. This list can grow to accommodate additional input device.
Gain (db) slider -- for setting the master gain (recording volume). The level is displayed next to the control (the value is 50 in the previous figure.) The displayed value changes as the slider is moved up and down.
Monitor slider -- for adjusting the volume of the incoming audio that is sent to the output device(s). It allows you to monitor the audio as it is being recorded.
Balance slider -- for setting the recording balance for the selected source.
Controlling the Master and Application Output
The Playback tab lets you control individual process audio output parameters. You can access it by selecting the Application Controls option from the View menu when the Playback tab is active. The new controls provided are exactly the same as those provided for the Master Output, with the exception that they are provided for one process at a time, rather than for an entire output device. Processes that are currently using audio are displayed in the list box at the top of the panel. By selecting a process, you can individually control the volume, balance, and muting of that process. If you have multiple audio channels, you can customize the individual volume and balance of each channel.
Recording Using the Master and Application Input
You can control individual process' audio input parameters using the
Master and Application Input screen. You access it by selecting the Application
Controls option from the View menu when the Record tab is active. Refer to
the following illustration for an example of this.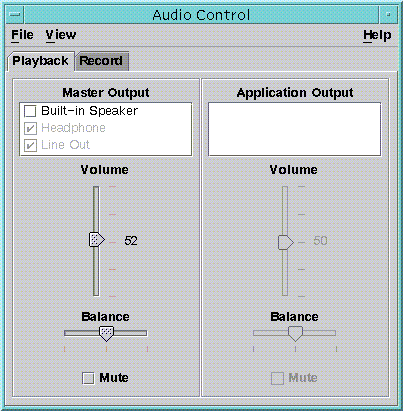
The controls provided behave exactly the same as those provided for the Master Output, with the exception that they are provided for one process at a time, rather than for an entire output device. Processes that are currently using audio are displayed in the list box at the top of the panel. By selecting a process, you can individually control the gain, and balance of that process. The Monitor volume is controllable only at the master level, so there is no Monitor Volume Slider on the Application Input panel.
Using the Status Dialog
This dialog allows you to view playback and recording status at the master level for each process. You can access it by selecting Status from the View menu. Audio Control detects the type of device in use. If the device supports playback, the Playback Status appears, if the device supports recording, the Record Status appears. Please refer to the following illustration.
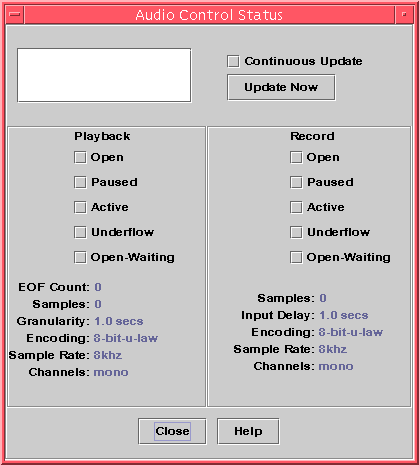
The controls provided are:
Process List Box -- this is a list of the items available for status monitoring. You can choose to view Master status or to see status for each of the running processes that are using dev/audio. You can choose only one process (or Master) to monitor at a time. As you select items in the list, the Playback and Record panes in the lower portion of the dialog update to reflect the status for the selected item being monitored.
Continuous Update Checkbox -- status is displayed at the time the dialog was invoked, unless you check Continuous Update. If Continuous Update is checked, the status for the selected process is continuously monitored and updated.
Update Now Button -- if Continuous Update is not turned on, you can update the display by clicking Update Now. If Continuous Update is turned on, the Update Now button is disabled (grayed out.)
The status of each of the following parameters being monitored and is represented by either an LED icon in the on or off state, or a text string with the details of the status item being displayed.
Playback and Record
Open -- The device is open by a process. The device may be opened read only, write only, or read and write. Which is why there is an open for play and one for record. These will be used only when mixing is disabled.
Paused -- The applications has commanded the device to pause playing or recording. Just like Open, you can have one direction paused while the other is active. Also, this will be used only when mixing is disabled.
Active -- Sound is being played or recorded. In mixer mode this means at least one stream is playing or recording. It is possible that other streams will be paused. When the mixer is off then there can be only a single play and record stream, so this means that single stream is active.
Underflow -- When playing there wasn't enough audio available so the device underflowed and there is silence. With the mixer this means that the stream didn't have enough sound to mix into the audio stream that is being played, so that one stream will have silence.
Open-Waiting -- When the mixer is turned of this means a process is trying to open the audio device and can't because another process already has the device open. When the mixer is enabled it means a process is either trying to open the audio device a second time for the same direction, or the mixer is out of resources and is waiting for another process to close the audio device and free up a resource for use.
EOF Count -- When playing it is possible to mark the audio stream so that you know when a segment has been played. This is done by doing a zero sized write and accepting signal. Each time this marker is encountered while playing the EOF Count will be incremented by one and a signal will be sent to the application.
Samples -- The number of sample frames that has been played or recorded. A sample frame is all samples to play one sample time. For example, playing a mono audio stream means that one sample frame has one sample, but playing a stereo stream means that one sample frame has two samples. One for the left channel and one for the right channel.
Encoding -- This combines two audio format properties, precision and encoding. Precision is the number of bits each sample uses. We support 16 bits and 8 bits. The encoding method determines any processing of the audio sample. This is usually done to compress the size of the audio stream so not as much data needs to be sent over the network or stored on disk. We support "linear" which is linear pulse code modulation, AKA linear PCM. We also support u-Law (u is for the Greek letter mu, which can't be reproduces in simple text like this, but it can in postscript), and A-Law. When combined together with precision we support 16-bit Linear PCM, 8-bit Linear PCM, 8-bit u-Law, and 8-bit A-Law. Also, linear PCM may be signed or unsigned, we support only signed.
Sample Rate -- The number of times a second the audio stream is sampled and thus converted from an analog signal to a digital number for recording. Or converted from a digital number to an analog signal when playing. The higher the number the greater the accuracy of the digital signal. But a higher number also means more disk space is needed for storage or network bandwidth is needed to transfer the data.
Channels -- The number of samples in a sample frame. Currently we support 1 (mono) or 2 (stereo).
Close Button -- Dismisses the Status dialog.


