Tools Subpanel
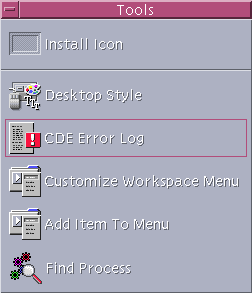
Use the Tools subpanel to setup your preferences for the desktop and workspace, to run Process Manager, and to view errors in CDE.

Table 4-8 Controls on the Tools Subpanel
| Icon | Name | Click Behavior | Drop Behavior |
|---|---|---|---|
 | Desktop Style | Opens Style Manager | None |
 | CDE Error Log | Displays the file $HOME/.dt/errolog which contains CDE errors after xsession startup | None |
 | Customize Workspace Menu | Warns you to update the workspace and opens a File Manager view of the Workspace menu | None |
 | Add Item To Menu | Opens the Add Item to Workspace Menu dialog box | None |
 | Find Process | Opens Process Manager for your workstation | Opens Process Manager in default mode |
Hosts Subpanel
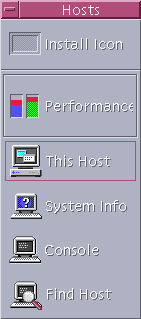
Use the Hosts subpanel to view system information, to monitor host performance, to open terminal and console sessions on hosts, and to find hosts.

Table 4-9 Controls on the Hosts Subpanel
| Icon | Name | Click Behavior | Drop Behavior |
|---|---|---|---|
 | Performance | Opens Performance Meter for your workstation | Opens Performance Meter in default mode |
 | This Host | Opens Terminal window for your workstation | None |
 | System Info | Opens Workstation Information for your workstation | Displays Workstation Information for dropped host name |
 | Console | Opens Console for your workstation | None |
 | Find Host | Opens Address Manager to search for host cards | Searches for dropped host name |
Help Subpanel
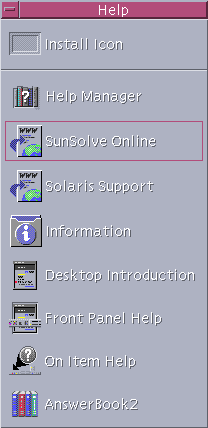
The Help subpanel enables you to access AnswerBook2™ documentation, the master help volume (Help Manager), and other online help volumes such as Front Panel Help.

First-time CDE Users
If you are upgrading from a previous version of CDE and want to read about the current features of the CDE desktop, see:
Desktop Introduction
Front Panel Help
If you are transitioning from another windowing system such as Microsoft Windows, see:
Desktop Introduction
Front Panel Help
Solaris Common Desktop Environment: User's Guide which can be accessed via the AnswerBook2 viewer
Help with Procedures
If you need to know how to carry out a procedure or task in CDE, see:
Help Manager and search the help volumes for the required procedure or keyword
The procedures in Solaris Common Desktop Environment: User's Guide which can be accessed via the AnswerBook2 viewer
Technical Issues and Support
System administrators will find Solaris Common Desktop Environment: Advanced User's and System Administrator's Guide (available via the AnswerBook2 viewer) useful for resolving configuration and administration issues.
System administrators investigating possible bugs should register with SunSolve™, the Sun Microsystems online information, FAQ, and patch service; click SunSolve Online for more details. For help with specific problems that may require interaction with technical support, click on Solaris Support.
The following table describes the Help subpanel controls.
Table 4-10 Help Subpanel Controls
Icon | Name | Click Behavior | Drop Behavior |
|---|---|---|---|
 | Opens a Help Viewer window displaying the top level of help information | Dropping a master volume file (*.sdl) opens that help volume | |
 | SunSolve Online | Opens a browser for the Sun Microsystems documentation and FAQ web site | None |
 | Solaris Support | Opens a browser for the Sun Microsystems download site for patches, and technical support | None |
 | Information | Opens the Information folder in Application Manager | None |
 | Desktop Introduction | Displays the Introducing the Desktop help volume | None |
 | Displays the Front Panel help volume | None | |
 | Provides on-item help for the Front Panel. Click this control, then click the control on which you want help. | None | |
| AnswerBook2 | Displays the AnswerBook2 viewer if you have AnswerBook2 installed. | None |
Trash Subpanel
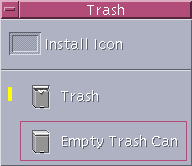
Use the Trash subpanel to trash and recover files, and to remove (shred) files from the system.

Table 4-11 Controls on the Trash Subpanel
| Icon | Name | Click Behavior | Drop Behavior |
|---|---|---|---|
 | Trash | Opens Trash Can window | Moves dropped files to the Trash Can window |
 | Empty Trash Can | Shreds (removes) contents of Trash Can window | Moves dropped files to Trash Can window |
Front Panel Applications
This section describes selected applications available on the default Front Panel. Other applications are described in their respective chapters, or in their online help or man pages.
Changing the Default Web Browser
The Links subpanel of the Front Panel contains a Web Browser control. When you click the control, the default browser is launched.
Your PATH environment is searched for the netscape command (for the Netscape browser) or hotjava command (for the HotJava™ browser).
If the netscape command is found first, the Netscape browser is launched. If the hotjava command is found first, the HotJava browser is launched. If neither is found, an error dialog box appears reporting the failure to find a browser.
The SdtWebClient action is used to launch your system's default web browser. If you want to ensure that the default is always Netscape, change the MAP_ACTION setting in your user-prefs.dt file to
MAP_ACTION SDtNetscape |
MAP_ACTION SDtHotJava |
 To Display a Different Clock
The Links subpanel of the Front Panel contains a Clock control. When you click the control, the default browser is launched. You can remove this control and display a digital clock on the desktop as follows:
Open the Links Subpanel.
Click mouse button 3 on the Web Browser control.
A pop-up menu is displayed.
Choose Promote to Front Panel.
The Web Browser control is displayed on the Main Panel and the Clock control is displayed on the subpanel.
Click mouse button 3 on the Clock control.
A pop-up menu is displayed.
Choose Delete.
The Clock control is removed from the subpanel.
Open the Desktop Tools folder in Application Manager.
Double-click Digital Clock.
The Digital Clock application displays the time and date. This application can be left on your Workspace permanently. Ensure that it is saved with your session defaults using Style Manager.


